Monday, March 31, 2014

Mani Monday - March Monthly Favorites

Hey y'all! So today, I am spring cleaning! I am fed up with the mess that is my room! So today for Mani Monday, I am posting my Monthly Mani Favorites for March! Yay! I'm sorry for those of you who like to see a new design every Monday, but I just don't have the time today! :( But I hope, y'all still enjoy today's post! I did quite a few wonderful designs that I fell in love with, but I narrowed it down to 5, even though I don't think I had much more than 5 this month(;

All manis, and colors used are listed here.

***If y'all came from my Instagram, and are interested in being my Nail Art Bestie, then keep reading!***

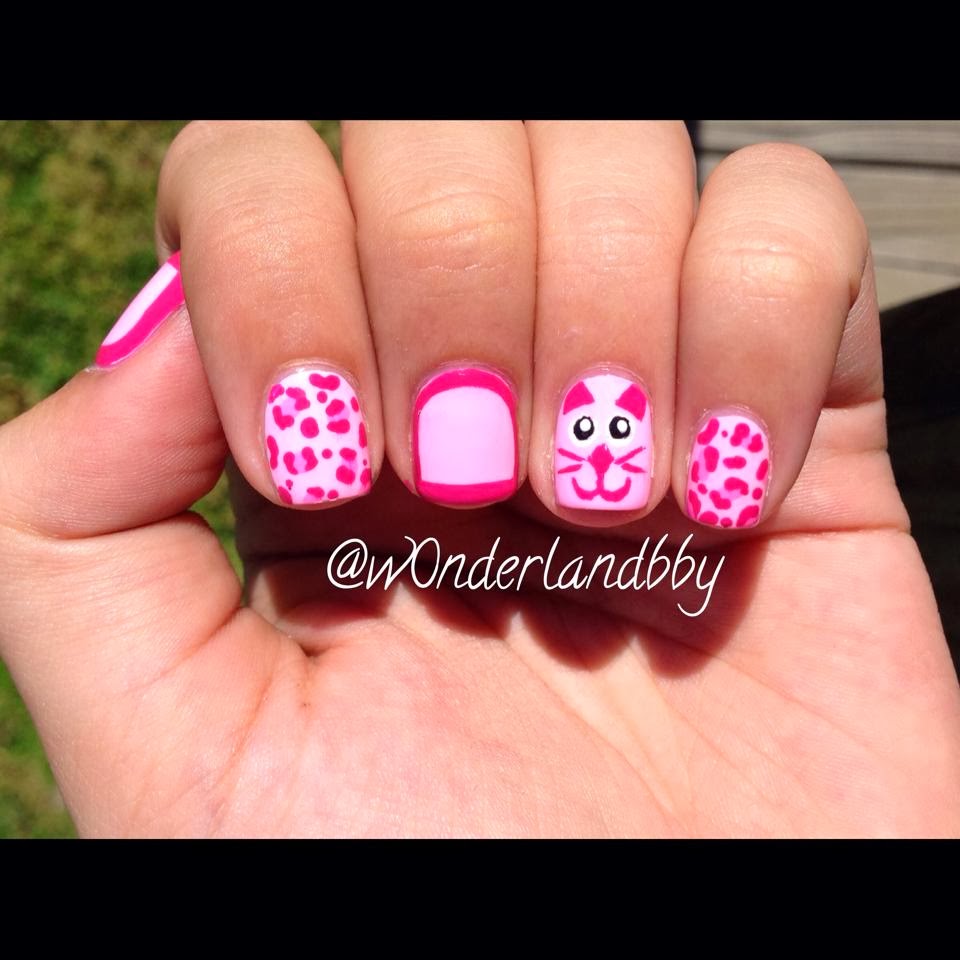
My Birthday Mani/Neon Tribal/Outfit Inspired/Dandelions/St. Patrick's Day

Nail Art Bestie

Ok ladies! I am searching for my Nail Art Bestie! Is it you!? I see the awesome friendships on Instagram with all you lovely nail artists, and I would like to have my own NAB! Wouldn't you!? I would like to find someone who's skill level is somewhat around mine (whether it's better, or 'not quite there yet'), just someone who would like to challenge themselves to try out some new designs so we can do Bestie Twin Nails, or for us to do a Mani Swap together. I would be posting our nail creations together on my Instagram, Facebook, Pinterest, Twitter, Tumblr, and here on my blog! Fun, right!?

Well, other than the skill level in my future Nail Art Bestie, I would also like to actually befriend you on every other friend-level, and not just nail art. I would like to have a nail crazy friend that I can talk nails 24/7, send nail mail to, and her return the favor. I wanna know your birthday, or anything special going on in your life, if you need advice, I'll be here for you for whatever, and hopefully vice versa. I am all for making new friends, always! So, if you would like to be considered for my Nail Art Bestie, please KIK me (w0nderlandbby) with the following info (I will fill my info in as a reference):

Name: Cassie
Age: 23
Location (State): Texas
Instagram Username: @w0nderlandbby
Favorite Indie Brand: Loaded Lacquer.
Why You Want To Be My Nail Art Bestie: I want you to be my NAB, because...
A Little About Yourself (Non Nail Related): I love cats! I have 2, and am considered a Crazy Cat Lady to my friends. I love going to concerts when I can afford it. I love tv shows, and movies. I have an awesome boyfriend! I live in a small hick town. lol.

So that's all you have to send, and I will get back to every single person who KIK's me! Thanks y'all! Oh, and don't forget to paint on! :P

Thursday, March 27, 2014

Neon Tribal!

This mani took me two days to complete! I was tagged in a picture on Facebook by a friend of mine to recreate this mani, n so I did! What do y'all think? Also, all colors used are listed here.


This is a little different from the picture I was looking at, but it's pretty damn close(; I searched the tag from the original photo on Instagram, but the account I found had no posts. So, I'm not sure if this person is the original creator of this design. If y'all know who it is, or if it is the person tagged in the original photo, please let me know. I hate not giving proper credit! 


Tuesday, March 25, 2014

Tutorial Tuesday - Dandelion

Hey y'all! I almost wasn't able get this posted today! But I pushed my plans back so I could! Yay!


1. Draw a little dot with a slender stem.
2. Create small spokes from the center dot, they don't have to be perfect!
3. Now here comes the fluffiness!
4. Now fill in those extra spaces with more dandelion fluffiness!
5. Draw a few fluttering dandelion seeds, and you're done!

I hope that this tutorial helps y'all!!! Paint on my lovies!

Monday, March 24, 2014

Mani Monday - Dandelions

So I was shown this design from a friend on Instagram...there was no watermark, so I'm not sure who's the originator of this art. I am more than willing to credit, I just need to know who to credit! So, if you could help me out, that'd be awesome!

This design is far from perfect. My very first dandelions! But I am pretty happy with it! What do y'all think? Leave a comment down below, and...paint on! ;)


Friday, March 21, 2014

Fantastic Friday

Hey y'all! I'm sad to say that my vision for "FANtastic Fridays" will be put to rest for now. I have been working very hard on making these nail polish rings, and I'm trying to make sure they are perfect before selling any of them. It's taking me longer than expected, but the outcome will be well worth the wait. Well, I believe it will be, and I hope to prove that to y'all very soon! If you've seen my Instagram then you've seen the few rings I've been able to complete lately. Well, I'm hoping to produce more and "open shop". 

Thanks for reading! Don't forget to check back on Monday for my Mani Monday post! Paint on!

Thursday, March 20, 2014

Black & White with a touch of Pink!

Here is the adorable outfit I found a Pinterest a while back, and knew I just had to recreate it on my own nails! How did I do? ;P

I really wish I had mini button studs for this mani, but I guess my white dots will just have to do!

Colors used for my recreated mani listed here.


Tuesday, March 18, 2014

Tutorial Tuesday - St. Patrick's Day!

Hey y'all! Happy Tuesday! So this post is going to be short, sweet, and to the point! Only because I am working on making nail polish rings! Those ones I mentioned in my birthday post(; So let's get to this pictorial! So this took 3 thin coats of OPI's Gargantuan Green Apple over 2 coats of a white base.


1. Create a small heart at your cuticle with a dotting tool.
2. - 4. Keep creating hearts around each other but make sure you leave a space in between each heart.
5. Add a small line for a stem, and voila!

Simple, right!? Hope y'all enjoyed! Paint on!

Monday, March 17, 2014

Mani Monday - St. Patrick's Day!

Happy Monday y'all! But more importantly, Happy St. Patrick's Day! I don't know about y'all, but I don't particularly have any green articles of clothing, so I had to use a different route so I wouldn't get pinched today! Because believe me...you do NOT want to see what I am like if I get pinched! hahah.

So for today, I did this really adorable mani which included a waterfall of colors from the rainbow, lucky four leaf clovers, and of course...GOLD!

All the colors I used are listed here


Don't forget to check back tomorrow for a pictorial of the clovers! Paint on!

Sunday, March 16, 2014

Happy Birthday to Me!

Hey y'all! So I just turned 23! Pretty exciting stuff! I just wanted to let y'all know what I plan on doing now that I am a year older. Nothing special since Corbey, and I are working on moving this month (fingers crossed), so we've got a lot of money tied into that, and that's what I really want for my birthday...our own place again! haha.
But with the extra money we DO have, I'm hoping to actually purchase a few things to start making nail polish jewelry! Would y'all be interested in them? I'm going to start out with rings, but eventually I want to make necklaces, bracelets, earrings, anklets, you name it! I think that that would be a really fun hobby to go along with my nail art/polish addiction...I mean hobby! Hobby! No one's addicted around here! hehe(; So definitely keep an eye out for those future posts!

Leave me a comment down below on what kind of nail polish jewelry you would be more interested in purchasing, along with a general size. I'm on a mission to find the materials to make all different ring sizes, and eventually I will be looking into different lengths of chains for necklaces. So if you would like to have some input, I would really appreciate it! Thank y'all! I hope you have an awesome, and safe weekend!

Thursday, March 13, 2014

Beauty DIY - Blackheads

Let's be honest! How many of you just hate those embarrassing little blackheads that plague our noses? I'm not ashamed to say that there are definitely blackheads on my own nose, and I would want nothing more than for them to disappear!

So I decided to try this little beauty DIY I found on Pinterest to get rid of those pesky blackheads. It was a really simple, and cheap little paste you make out of lemon juice, and baking soda! You probably even have these items in your house already. Now, the link I found didn't have any exact measurements for the lemon juice, and baking soda. But don't worry, all you need to do is squeeze a lemon, and add baking soda until you create a thick creamy paste. Apply that paste all over your nose, and let it sit for 20 mins. Rinse with cold water when finished.

Now, I won't lie. I didn't get the extreme results I saw on Pinterest. You know, not all of my blackheads disappeared, but it DID help clear up some of the bigger ones. Which is fantastic! I will definitely want to do this maybe once or twice a week for even better results. I will keep y'all updated on how that goes later on. But for now, let's talk about my first time trying this little paste.

It took me a few minutes to get the paste to the thickness I needed for it to not completely run down my face. I just mixed the ingredients in a bowl with a fork, worked just fine, but I may have made a little extra. After I applied it all over my nose I immediately felt it start to tingle, and maybe burn just a little bit. But it wasn't bad at all. It felt...cleansing. I sat, and watched some tv for 20 mins to distract myself. As it dried, it started to harden, so that's normal, don't worry. I've got pictures of my before, and after to show y'all. However, I have to warn you...I've had to filter the shizzy outta them so you could really see the blackheads on my nose. So...avert your eyes if you're squeamish! lol.


So in the pictures above you can see that I do still have a few blackheads in my after photo (right), but there's not as many as before. Which is pretty awesome if you ask me. If you wanna see an even closer look, just keep scrolling...

I'm not really this orange. Remember all the filtering I had to do!

WHOA! That is extremely close now, isn't it!? As embarrassing as these photos are, I am still willing to publicize them for y'all's viewing pleasure! lol. But here you can REALLY see the difference this little homemade paste made for my nose. Pretty incredible if you ask me!

Overall, I am pretty please with this paste. Simple, cheap, and I can do it myself! After rinsing with cold water, I noticed my nose is a lot less oily, and it just feels cleaner, fresher. I will definitely be incorporating this into my beauty routine with high hopes of even better results!

I hope that y'all enjoyed, and let me know if you decide to try this for yourself. I would love to hear/see any results from other people(:

Tuesday, March 11, 2014

Tutorial Tuesday - Emmalynn

So, I'm not sure how I managed to actually remember to take pictures for my pictorial, but I will tell you that I had totally forgot to when I had started! So I had to clean my nail off, and start over! How frustrating! I gotta get into the groove of doing pictorials on the norm! I think it's really fun to show y'all how I go about creating some of my designs(: I hope y'all enjoy this tutorial of my sad little kitty! lmao.


1. Paint two (2) coats of a pastel pink base color.
2. Start with a wide, curvy "w" for the mouth, and add a diamond for a nose (I started with the mouth, and nose so that I could center the eyes better).
3. Add the cute little whiskers.
4. Add white dots for the eyes on either side of the diamond, and draw little triangles for the ears.
5. Add a black dot inside each eye, and another tiny white dot inside that black dot, and voilà!

Pretty simple, right!? I hope y'all enjoyed, and I'd love to see any recreations out there! Paint on!

Monday, March 10, 2014

Mani Monday - Emmalynn

Happy Monday y'all!
Today's mani was inspired by one of my friend's adorable children, Emmalynn Faith! As soon as I saw her post this picture of sweet little Emma on our random Texas ice day, I knew I wanted to recreate her outfit on my nails! It was just so pink, and cute, and what girl doesn't love pink!? I know I do! I know my kitty nail is not purrfect, but I tried! haha. Hope y'all enjoy this girly design!

Colors used for this mani are listed here.


Also, don't forget to check back tomorrow for the pictorial for this cute design for my Tutorial Tuesday post!


Friday, March 7, 2014

Contest Prizes!

So my first contest closed last night at midnight, and since there were only 3 entries, I decided to give all of them some sort of prize for participating! Prize details, and contestants listed below! (All contestant usernames are for instagram)


@AshleyMcGraw15 is winner #1, and her prizes are:
Orly - You're Blushing
Maybelline Color Show Holographic - Lavender Luster
Sinful Colors - Secret Admirer/Frenzy
Pure Ice - Come Closer/Endless Fortune
Along with some brushes, and 3D nail art bows (not pictured).

@Eve_Joy will receive prize #2 for being my first ever contestant!
Wet 'n' Wild - Mixing it Up/Club Cabaret
Pure Ice - No Means No
Sally Hansen Gem Crush - Cha-Ching!

@CuteNailIdeas1234 will receive prize #3 for being my other participant!
Kleancolor - Fuchsia Glitter
The Color Workshop - Unnamed black base with small orange, and holo glitters.
Unnamed Glitter topper - I received 2 of these from a friend, and it's actually a pretty close dupe to Essie's Carnival glitter topper).

I appreciate all of y'all for participating! Hopefully next contest I host y'all will enter again! Thank you for the love, and support y'all have displayed! I am so grateful!

FANtastic Friday! @AshleyMcGraw15

TGIF! Am I right!? Well, for my very first FANtastic Friday, I am featuring my first contest's winner! @AshleyMcGraw15 (IG)! She had to recreate my #HePicksMyPolish manicure (colors didn't matter), and she did pretty damn good! Be sure to check her out on instagram! She posts a bunch of really cute manis, and is a very sweet girl! Thank you Ashley for participating, and congratulations on winning my very first contest! I hope you enjoy your prizes!


Tuesday, March 4, 2014

Tutorial Tuesday - Pastel Dry Brush!

Since this is my first pictorial, it is just of the background color palette. Honestly, I kept forgetting to take a picture after every step I did! Luckily I was able to get these! If you haven't read my Mani Monday post about these nails, then you wouldn't know who inspired me to do this design, and she is an amazing nail artist! And there's a link to her youtube video I watched for this on that post as well. So you might want to check it out(;

Let's begin!


1. Paint two (2) coats of a white base color (or maybe a nude, but I used white).
2. Starting with your darkest color, wipe excess paint off the brush.
3. Wipe EVEN MORE excess paint off the brush (I found that notebook paper works best).
4. Swipe over white base randomly (you may have to do this several times to get desired opacity of swipes).
5. Continue with all colors until you are happy with the outcome (I did end up repeating some of my darker colors after one time around with all colors).

And that's it! How easy, right!? If you would like to know what colors I used for this funky mani, just pop on over to My Nail Art page to get in on the not-so-secret secret colors! ;P Thanks for stopping by!

Mani Monday - Pastel Dry Brush

I know, I know, I know! I'm already late on my first Mani Monday! I intended on being able to post it yesterday, but Texas had a huge ice storm Sunday evening, and caused a lot of things to be closed yesterday, including Corbey's job. So he stayed home, and totally threw off my usual Monday routine! And I broke 2 nails! So I had to reshape, and file down to nubs! lol. So, I apologize again, and will do better!

So now that all the ice is melting outside, how about I quit rambling, and get to this really fun, spring time mani!?

All colors used listed here!
So, this is totally my first time ever doing the Dry Brush Technique! I watched a youtube tutorial on it after seeing @ChristabellNails on Instagram. If you would like to watch it as well, just click here! My ring finger was inspired by her design, even though my flowers aren't as pretty as hers! It's not as easy as she makes it look ladies!

Even though I absolutely loved her entire design, I wanted to put my own sort of touch to it. So I decided to put cheetah prints on my outside nails to act as a "border", because I'm obsessed with animal prints, and it didn't cover the background as much as the flowers. And that amazing black stud on my middle finger (and on my thumb) just pulls it all together for me. A lot of times I feel like my manis are missing something, and today I felt the same way. So I stuck a stud on it, and fell in love! Maybe I should add more bling to my future manis!?

So let's talk about this dry brush technique. In ChristabellNails' tutorial she wiped her brush off on notebook paper, and a paper towel. So I did the same, but found that it wiped too much polish off. So just the notebook paper was enough for me. I started with my darkest colors first so they wouldn't just take control of the lighter colors I used like she explains. I really love this technique. I think it's funky, and different, and it creates a beautiful mesh of the pastel colors that I used. I feel like I've got an abstract piece of art on my nails! How fun, right!? This was done over 2 coats of a white base, and it dried so quickly since you don't use much polish! Bonus points!

I actually had the white base, and the colors dry-brushed on my nails last night, no top coat, or designs. Just the colors. It was pretty texturized, and I was a little worried that if I didn't put a layer of top coat on them at night, they would be too dry, and set up in the morning for the top coat to really smooth them out. Thankfully, I was wrong! After drawing the designs this morning, I applied my top coat as normal, and wooosh! Smooth blended colors! What a victory! lol.

The pictorial for this mani will be posted later today, so don't forget to come back, and check that out! Thank you!

Monday, March 3, 2014

What to Expect

So I've been thinking long, and hard on how I want to keep up with my blog, and I have finally come to the conclusion! At 5 o'clock in the morning when I SHOULD'VE been sleeping in! lol. I want to be able to for sure write a new blog post 3 times a week, at the very least! So here's what I've come up with so far...

Mani Mondays I will post a new mani. Whether it be a swatch, skittlette, nail art design, or whatever, I will post a new mani every single Monday! Well...that's the idea anyway(; Next we have:

Tutorial Tuesdays! Yay! I will have the tutorial on how I achieved my mani from the previous day! How fun right!? They will only be pictorials seeing as I don't have a camera to upload any videos to YouTube (maybe one day).

FANtastic Fridays is something that I've been thinking about for a little bit now. I would like this to eventually take off, and be a fun day for me to post things. My idea behind it is to post any recreations of my manis on Fridays. Yes, YOUR recreation of one of any of my designs could be featured on my blog on Fridays! I think that would be a really fun way for my "fans" to interact with me, and be apart of my blog! Especially since I wouldn't even have a blog if it wasn't for y'all!

Now those are just some basic, general ideas I've come up with this morning. I may add a few days to it to keep my blog even more active. But I think this would be a really good start. I am extremely excited to start sharing, and interacting with y'all! If you have any ideas for the rest of the days of the week I didn't list, or if there's a specific topic you'd like me to cover, then don't be shy! Leave me a comment down below, or contact me! Swear I won't bite(:

Ps. I was thinking about a Tutorial Thursday as well, but instead of the pictorial being on my mani from Mani Monday, I was thinking I could do a tutorial of any of my previous designs that anyone would like me to do. But how am I to know which designs y'all would like a pictorial of? Should there be a specific day for it? Maybe Wednesdays? Thoughts?

Bloglovin Love

Follow my blog with Bloglovin